

By Halco Trailers Team, Trailer Manufacturing / Safety Specialist
Published: 28 September 2026
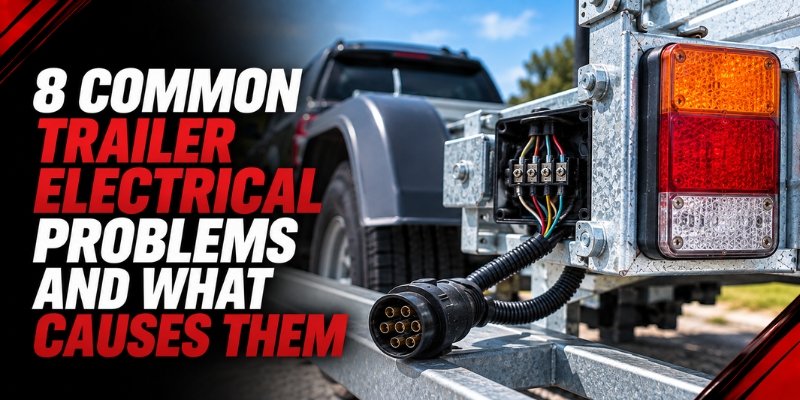
Trailer electrical problems can cause failed indicators, brake lights, tail lights, flickering lamps, intermittent connections and electric-brake faults. The most common causes include poor earth connections, corroded plugs, damaged wiring, water ingress, loose terminals and faulty lamps.
For tradies, contractors, landscapers, farmers, automotive businesses and homeowners, a trailer electrical fault can become more than an inconvenience. A failed indicator can reduce visibility to other drivers, while a damaged connection can affect lighting or electric-brake circuits.
This guide explains eight common trailer electrical problems, what causes them, how to check trailer wiring safely and when a trailer needs professional electrical inspection or repair.
What are the most common trailer electrical problems?
The most common trailer electrical problems involve failed lights, flickering connections, poor earths, damaged wiring, corroded plugs, indicator faults, brake-light failures and electric-brake wiring issues. These faults are often caused by vibration, moisture, road debris, corrosion or poor previous repairs.
Trailer wiring is exposed to conditions that normal vehicle wiring may avoid. Cables can run underneath the chassis, near suspension components, around drawbars and through areas exposed to water, mud and stone impact.
Australian VSB 1 specifies that trailer wiring must be supported at intervals of no more than 600 mm, protected from chafing, insulated at joints and positioned away from excessive heat and moving parts. It also requires an earth return wire between the trailer and towing vehicle rather than relying on the coupling or safety chain as the earth connection.
Trailer electrical fault guide
Problem | Common cause | What you may notice |
No lights work | Plug, socket, fuse, earth or main harness fault | Entire trailer appears electrically dead |
Lights flicker | Loose connection, poor earth or damaged cable | Lights change when hitting bumps |
One side fails | Lamp, earth or damaged wire | Left or right side stops working |
Indicators fail | Lamp, connector, wiring or vehicle circuit | Turn signal does not operate correctly |
Brake lights fail | Wiring, lamp, plug or vehicle circuit | Trailer does not show braking |
Plug connection fault | Corrosion, bent pins or loose terminal | Intermittent or complete electrical failure |
Wiring damage | Chafing, crushing, impact or corrosion | Exposed, broken or intermittent circuit |
Electric-brake wiring fault | Wiring, connector, earth or controller issue | Brake response or controller warning |
1. Trailer lights stop working completely
When all trailer lights stop working, start by checking the tow-vehicle socket, trailer plug, main earth connection, fuse or relay and the trailer’s main wiring harness. A single failed lamp is different from a complete electrical failure because several circuits may have lost their common connection.
This is one of the easiest faults to misdiagnose. Owners sometimes replace every lamp when the real problem is a corroded plug or broken earth.
What causes complete light failure?
- Damaged trailer plug
- Corroded socket or terminals
- Loose or broken earth connection
- Blown vehicle fuse
- Damaged main harness
- Incorrect adapter
- Disconnected wiring
- Water or corrosion inside a connector
The best starting point is to establish whether the fault is on the vehicle or trailer side.
Connect a known-good trailer to the tow vehicle if available. If that trailer also has no lights, investigate the vehicle socket, fuse, wiring or tow-control system. If the other trailer works normally, concentrate on the faulty trailer.
2. Trailer lights flicker or work intermittently
Flickering trailer lights usually indicate an unstable electrical connection, poor earth, damaged wiring, loose terminal or trailer plug connection problem. Vibration can make a weak connection appear normal while the trailer is stationary and fail once it is moving.
Intermittent faults are particularly important because they can disappear when the trailer is parked. A light may work during a driveway check and fail when the trailer hits a pothole.
Check these areas first
- Trailer plug pins
- Vehicle socket
- Main earth connection
- Lamp earths and terminals
- Wiring near the drawbar
- Cable sections close to suspension or moving components
- Previous joins or repairs
- Areas exposed to water or road debris
If the lights flicker when the trailer moves, do not treat the problem as a harmless nuisance. The movement itself may be revealing a loose or damaged connection.
3. One side of the trailer lights stops working
When one side of the trailer lights fails while the other side continues working, the fault is often local to that side’s lamp, earth, wiring, connector or harness branch. If several functions fail together on the same side, inspect the wiring before replacing individual lamps.
For example, if the left indicator, left tail light and left clearance lamp all stop working together, a shared wiring connection is more likely than three independent lamp failures.
One-side failure checklist
Symptom | Possible cause |
One lamp fails | Failed lamp or local connection |
All lamps on one side fail | Wiring or earth fault |
One side flickers | Loose connection or damaged cable |
Lamp works after moving cable | Broken wire or poor terminal |
Lamp works on another trailer | Fault is likely on the original trailer |
Lamp works directly but not through trailer | Plug, harness or earth issue |
Before replacing several lamps, check the circuit supplying them. This can save unnecessary parts and identify the actual source of the fault.
4. Trailer indicator lights do not work correctly
Trailer indicator light problems can be caused by a failed lamp, incorrect wiring, damaged plug pins, poor earth, vehicle-side wiring faults or an incompatible electrical setup. Fast flashing, no flashing or an indicator working on only one side should be diagnosed rather than assumed to be a lamp failure.
Modern tow vehicles can also have vehicle-specific trailer wiring and monitoring systems, so an apparently simple trailer fault may originate from the tow vehicle.
What to check
- Test the tow vehicle’s indicators without the trailer.
- Check the trailer plug and socket.
- Inspect indicator lamps and connectors.
- Check the earth connection.
- Look for damaged wiring on the affected side.
- Confirm that an adapter is correctly configured.
- Check whether recent electrical modifications were made.
Do not rely on wire colour alone when diagnosing an existing installation. Previous owners or repairers may have modified the wiring.
The current Australian VSB 1 also recognises direction-indicator lamps as part of the trailer lighting requirements, so functioning indicators are an important part of the trailer’s electrical system.
5. Brake lights work incorrectly or fail
Trailer brake-light faults can result from a failed lamp, poor earth, damaged wiring, connector corrosion, plug-pin problems or a fault in the tow vehicle’s trailer-light circuit. Because brake lights warn following drivers that the vehicle is slowing, a failure should be repaired before normal road towing.
Brake-light faults can sometimes appear alongside indicator faults because these circuits share parts of the trailer harness or connector.
Brake-light troubleshooting
What happens | Where to investigate |
Both brake lights fail | Plug, earth, vehicle circuit or main harness |
One brake light fails | Lamp or local wiring |
Brake lights flicker | Earth or connection |
Brake lights remain on | Wiring or vehicle-side circuit |
Brake lights work only with another vehicle | Tow-vehicle compatibility or socket |
Brake lights fail after rain | Water ingress or corrosion |
If the trailer also has electric brakes, do not assume that working brake lights mean the braking circuit itself is working. Lighting and braking functions can use different electrical circuits.
6. Trailer plug connection problems
Trailer plug connection problems commonly come from corrosion, bent pins, loose terminals, cracked housings, cable strain, dirt, moisture or an incorrectly wired plug. Because the plug is the main electrical connection between the tow vehicle and trailer, a small connector fault can affect multiple functions.
Common Australian trailer connector arrangements include 7-pin flat and round configurations, with the correct connector depending on the trailer and towing setup.
What should you inspect?
- Plug housing for cracks
- Pins for corrosion
- Terminals for looseness
- Cable entry for strain or damage
- Socket for dirt or corrosion
- Adapter connections
- Signs of water ingress
- Evidence of previous rewiring
Never assume a plug is wired correctly simply because it fits. A trailer may have been rewired, modified or repaired by a previous owner.
The Department of Infrastructure’s current VSB 1 provides requirements for electrical connectors and trailer wiring for applicable trailers. The connector must suit the applicable Australian standard and the trailer’s electrical configuration.
If a plug is physically damaged or terminals are loose, replacement is often safer than continuing to use an unreliable connection.
7. Damaged, corroded or exposed trailer wiring
Trailer wiring becomes vulnerable when cables are crushed, stretched, rubbed against metal, exposed to heat, damaged by road debris or left unprotected from moisture. Corrosion can also increase electrical resistance and create intermittent faults that become worse over time.
Look carefully along the complete harness rather than only around the lights.
Common wiring damage locations
- Drawbar and plug area
- Chassis cross-members
- Suspension clearance areas
- Behind lamp housings
- Around mudguards
- Near tailgates and moving doors
- Under the trailer floor
- Previous splice points
- Areas exposed to stone impact
- Cable entry points
Australian VSB 1 requires trailer wiring to be protected from chafing and positioned so it cannot contact moving parts or become overheated. It also calls for wiring to be adequately supported and protected against the vibration experienced during trailer use.
A damaged cable should be repaired using an appropriate automotive electrical repair method. Avoid temporary joins that leave conductors exposed to water, dirt or vibration.
8. Electric-brake wiring faults
Electric-brake wiring faults can occur through damaged brake wiring, poor earth connections, corroded plug pins, loose terminals, damaged connectors or problems with the tow vehicle’s brake-controller circuit. The result may be weak, intermittent or abnormal trailer braking.
This fault is more serious than a simple lamp problem because electrical problems can affect the trailer’s braking system.
Possible warning signs
- Trailer brake controller reports a connection problem
- Braking becomes intermittent
- Trailer brakes respond weakly
- Brakes behave differently after hitting bumps
- Brake operation disappears temporarily
- Wiring near an axle appears damaged
- Plug pins show corrosion
- Earth connection is loose or corroded
If an electrical fault affects electric brakes, do not continue normal loaded towing until the system has been properly diagnosed.
Halco’s trailer safety parts guide also highlights wiring plugs, earth connections, brake lights, indicators and electric-brake wiring as important trailer safety components.
How can you check trailer wiring step by step?
You can check trailer wiring by separating the vehicle and trailer sides, inspecting the connector, checking the earth, testing each lighting function and tracing the harness for physical damage. A multimeter or suitable circuit tester can help identify where power or continuity is lost.
10-step trailer electrical inspection
- Turn the vehicle off before inspecting connections.
- Inspect the trailer plug: look for corrosion, bent pins, cracks and loose terminals.
- Inspect the tow-vehicle socket: check for corrosion, dirt or damaged contacts.
- Check the main earth: make sure the trailer has its dedicated earth return connection.
- Test the vehicle independently: confirm the tow vehicle supplies the expected functions.
- Connect the trailer securely: make sure the plug is fully seated.
- Test tail lights and clearance lights: check both sides.
- Test indicators and hazard lights: check left and right separately.
- Test brake lights and electric brakes where fitted: investigate any abnormal response.
- Trace the harness: look for crushed, stretched, rubbed, exposed or poorly repaired wiring.
Do not probe unfamiliar vehicle wiring blindly. Modern vehicles can have electronic monitoring and trailer-control systems. If you are unsure which circuit you are testing, use the correct wiring information for the vehicle and trailer or arrange professional diagnosis.
When does a trailer need professional electrical inspection?
A trailer needs professional electrical inspection when faults keep returning, multiple circuits fail, wiring is damaged, electric brakes are affected, the plug has been incorrectly modified, water has entered electrical components or the source of the fault cannot be identified.
A basic lamp replacement is different from diagnosing an intermittent harness fault. The more functions that fail together, the more important proper circuit diagnosis becomes.
DIY check vs professional inspection
Fault | Basic owner check | Professional inspection |
Failed lamp | Yes | If replacement does not fix it |
Dirty plug | Yes | If corrosion or damage is severe |
Flickering lights | Initial inspection | If fault returns |
One indicator fails | Lamp and connector check | If wiring is suspected |
Complete electrical failure | Plug and fuse check | If fault remains |
Damaged harness | Visual identification | Repair required |
Electric-brake wiring fault | No | Yes |
Repeated intermittent fault | No | Yes |
Incorrect previous wiring | No | Yes |
Water-damaged electrical system | No | Yes |
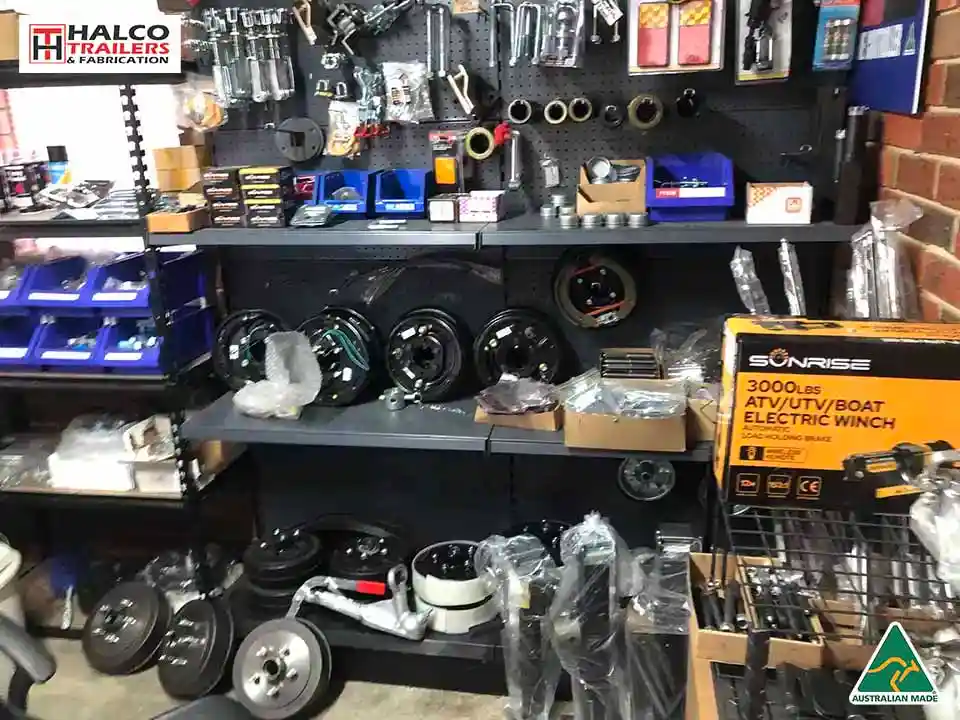
Halco’s parts and servicing workshop can inspect applicable trailer electrical systems, including plugs, wiring harnesses, earth connections, connectors, indicators, brake lights, clearance lights and electric-brake wiring.
How can trailer owners prevent electrical faults?
Trailer electrical problems can be reduced by keeping connectors clean and protected, securing wiring away from moving parts, checking lights before every trip, repairing damaged cables early and inspecting the harness after rough or wet use.
Preventive electrical maintenance checklist
Check | Recommended action |
Trailer plug | Inspect for corrosion and physical damage |
Vehicle socket | Keep contacts clean and check for looseness |
Earth connection | Keep secure and protected from corrosion |
Main harness | Check for rubbing, crushing and stretching |
Lamp housings | Check for cracks and moisture |
Indicator lights | Test before every trip |
Brake lights | Test before every trip |
Clearance lights | Check during routine inspections |
Electric-brake wiring | Inspect after damage or suspension work |
Cable support | Keep wiring secured and away from moving components |
Previous repairs | Recheck temporary or questionable joins |
Water exposure | Inspect after flooding, washing or boat-ramp use |
VSB 1 specifically notes that trailer wiring and connections should withstand the vibration experienced during trailer use and that electric-brake wiring needs appropriate protection from road debris.
How much does trailer electrical repair cost?
Trailer electrical repair costs vary according to whether the fault is a lamp, plug, connector, earth, harness, brake circuit or larger wiring problem. Simple component replacement is usually less involved than tracing an intermittent fault through a complete harness.
Main cost factors
Cost factor | Why it matters |
Lamp replacement | Usually a straightforward component job |
Plug replacement | Depends on connector type and wiring condition |
Earth repair | Can be simple or involve wider corrosion |
Harness damage | Repair scope depends on location and length |
Intermittent fault | Diagnosis can take longer |
Electric-brake wiring | Requires additional safety-focused testing |
Water damage | Multiple components may be affected |
Previous modifications | Incorrect wiring can increase diagnosis time |
Tow-vehicle integration | Vehicle-side faults may require separate testing |
For businesses, the cost of downtime can be greater than the repair itself. A trailer that cannot legally or safely operate can delay deliveries, machinery transport, landscaping work or construction jobs.
Conclusion
The most common trailer electrical problems come down to a small group of causes: poor connections, damaged wiring, corrosion, moisture, faulty lamps and earth problems. The key is to diagnose the circuit instead of replacing parts at random.
Check your trailer lights before every trip, inspect the plug and wiring regularly, and take recurring electrical faults seriously. If an electrical problem affects electric brakes, multiple lighting functions or the main harness, professional inspection is the safer choice.
Halco Trailers provides trailer repair, servicing and replacement parts from its Warragul workshop, supporting customers across Melbourne, Gippsland and regional Victoria. Its workshop can inspect applicable trailer electrical, lighting, braking and related running-gear faults.