

Knowing how to grease trailer wheel bearings can help you prevent excessive heat, premature wear, and an inconvenient breakdown on the way to a job, property, or weekend project.
The job involves more than pumping grease into a hub. Proper bearing maintenance usually means removing the hub, cleaning away the old lubricant, checking the bearings and cups for damage, forcing fresh grease through the rollers, and adjusting the hub correctly during reassembly.
That inspection is especially important for trailers that work hard. A landscaper carrying soil in a hydraulic tipper trailer, a contractor moving an excavator on a plant trailer, or a farmer towing equipment over rough property tracks places far more demand on wheel bearings than an empty trailer travelling a few kilometres each month.
Quick answer: To grease trailer wheel bearings, safely lift and support the trailer, remove the wheel and hub, clean the old grease from the bearings, inspect the rollers and cups, force compatible wheel-bearing grease through every roller, install a new seal, refit and adjust the hub, then complete a short road test and check for heat, leakage, or wheel movement. Most conventional trailer hubs need to be raised and the hub removed for a complete repack, though some purpose-fitted lubrication systems allow topping up without full dismantling.
Timken’s trailer-bearing guidance recommends cleaning and inspecting the hub, spindle, bearings, and cups before lubrication, and instructs users to force grease between the bearing rollers, cage, and cone rather than merely coating the outside.
Safety warning: Never work on a trailer supported only by a jack. Use firm, level ground, chock the wheels remaining on the ground, and support the trailer with appropriately rated stands. For braked, heavy-duty, or unfamiliar hub systems, follow the trailer or axle manufacturer’s procedure.
Why Properly Greased Trailer Bearings Matter
Trailer wheel bearings sit inside the hub and allow each wheel to rotate while supporting the trailer and its load. Grease creates a lubricating film between the bearing rollers and cups, reducing damaging metal-to-metal contact.
Grease also helps protect internal metal surfaces from moisture and corrosion. Timken recommends applying a thin film to relevant hub, spindle, race, and seal surfaces to help protect against dry starts and moisture-related damage.
When lubrication breaks down, several problems can follow:
- The hub may run unusually hot
- Bearings may become noisy or rough
- The grease seal may leak
- The wheel may develop excessive movement
- Bearing cups, hubs, or spindles may become damaged
- A bearing may eventually seize or separate
A common example is a tradesperson who uses the same trailer five days a week. The trailer may only travel short distances, but it repeatedly carries tools and materials, brakes at intersections, and operates on unfinished sites. That repeated loading and heat cycling can be harder on the running gear than occasional highway towing.
Halco Trailers provides preventive maintenance and repairs covering trailer bearings, brakes, axles, suspension, electrical systems, and structural components from its Warragul workshop.
Does the Bearing Need Grease, Repacking or Replacement?
Understanding how you grease trailer bearings and whether the situation calls for a top-up, a full repack, or a replacement starts with knowing what you are looking at before reaching for the grease.
Topping Up Grease
Some hubs have a purpose-designed grease nipple, greasable spindle, or lubrication system. These systems may allow grease to be added without completely dismantling the hub.
Do not assume every visible grease fitting works the same way. Excess pressure or repeated overfilling can damage a seal or push grease towards brake components. Follow the instructions for that specific hub system.
Hand-Packing a Bearing
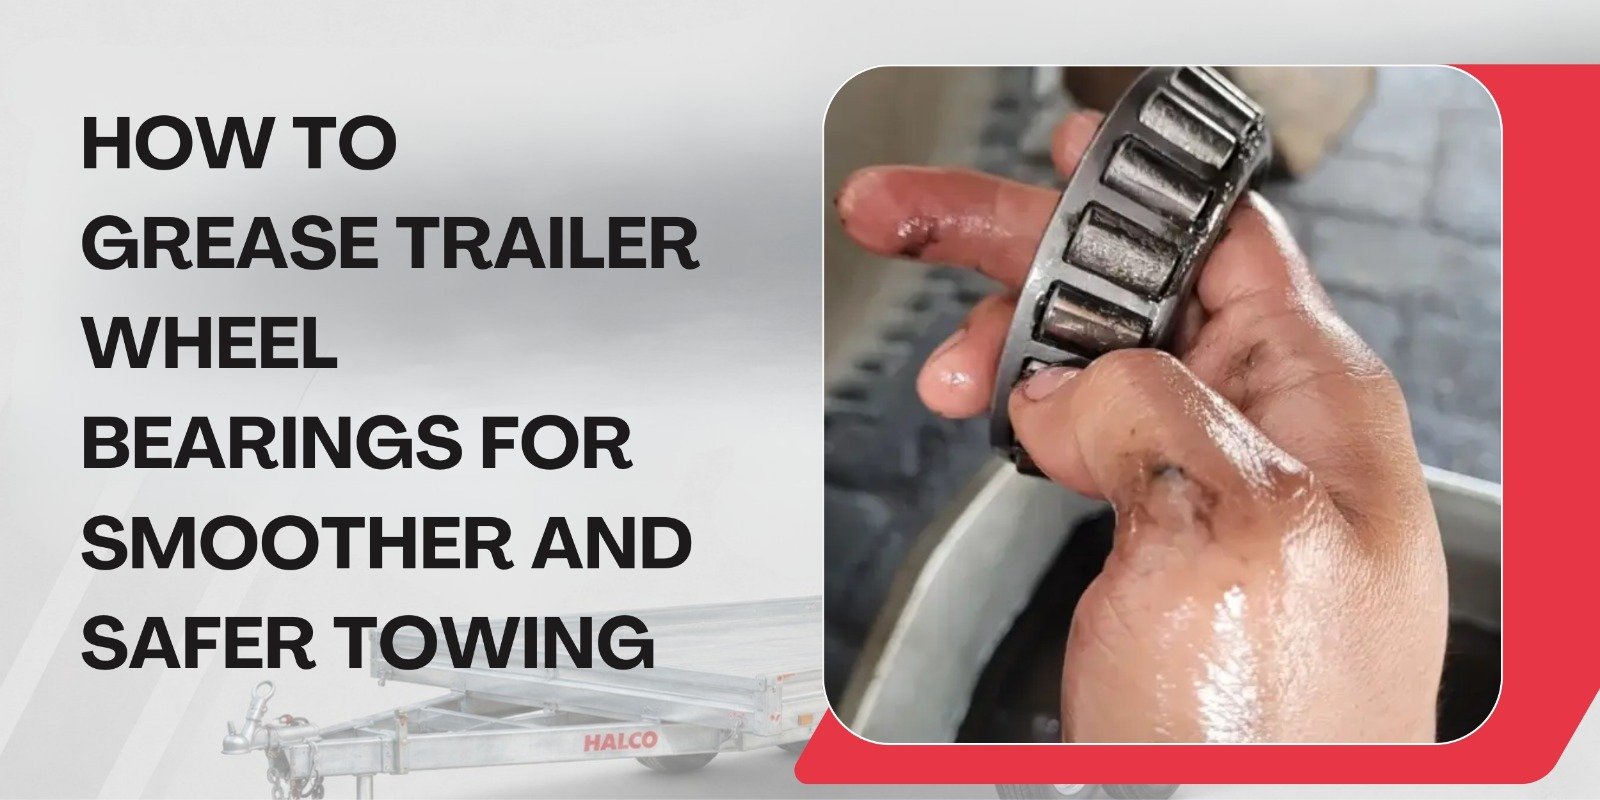
Hand-packing means forcing fresh grease through the bearing until it appears between the rollers on the opposite side. Smearing grease over the outside does not fully lubricate the internal rolling surfaces.
Repacking Trailer Bearings
Repacking is a complete maintenance process. It includes:
- Removing the hub and bearings
- Cleaning away the old grease
- Inspecting the bearing, cup, hub, seal, and spindle
- Repacking serviceable bearings
- Installing a new seal
- Reassembling and adjusting the hub
Replacing the Bearing
Grease cannot repair physical damage. Replace the bearing when the rollers or cup show pitting, scoring, corrosion, cracking, roughness, or heat discolouration.
AL-KO advises that bearing cups and cones should be replaced as matching sets, and that identifying numbers are normally stamped on the cup and cone.
What You Find | Recommended Action |
Smooth bearing with clean grease | Inspect and repack if servicing is due |
Dry, old, or hardened grease | Clean completely and repack |
Milky or moisture-contaminated grease | Check for water entry and replace the seal |
Metallic particles in the grease | Replace the bearing and inspect the hub and spindle |
Pitted rollers or bearing cups | Replace the cup and cone as a set |
Blue, black, or heat-marked components | Replace damaged parts and investigate the heat source |
Grooved or badly scored spindle | Stop and arrange professional inspection |
Grease on brake linings | Repair the leak and have the brake components inspected |
Signs Your Trailer Wheel Bearings Need Attention
You may notice a bearing problem before removing the hub.
Grinding, Humming, or Rumbling
A bearing should rotate smoothly. Grinding or rumbling can indicate worn rollers, contamination, damaged cups, or inadequate lubrication.
One Hub Is Hotter Than the Others
After a short trip, compare the hubs carefully. A noticeably hotter hub could indicate incorrect bearing adjustment, insufficient lubrication, brake drag, or internal damage.
An infrared thermometer provides a safer and more objective comparison than placing your hand directly on a hot hub.
Movement at the Wheel
With the wheel safely lifted, hold it near the 12 and 6 o’clock positions and rock it in and out. Obvious movement or clunking may indicate loose adjustment, bearing wear, or another wheel-end problem.
Grease Leaking Behind the Hub
Grease around the rear of the hub may point to a worn, damaged, or incorrectly installed seal. On a braked trailer, leaking grease can contaminate the brake linings.
Uneven Tyre Wear
Uneven wear does not automatically mean the bearings are faulty. It can also involve tyre pressure, alignment, suspension, or axle problems. However, bearing movement should be included in the inspection.
AL-KO recommends periodic inspection and lubrication of trailer bearings and advises checking brake linings for grease or oil contamination.
Noticing a hot hub, grinding noise, or grease leak? Don’t tow until it’s checked. Halco Trailers inspects and services bearings, brakes, and running gear for all trailer types across Warragul, Gippsland, and Victoria.
What Type of Grease Should You Use?
Use a quality grease specifically approved for automotive or trailer wheel bearings. The correct product depends on the bearing, hub design, expected temperature, load, and operating environment.
Trailer Use | Grease Considerations |
General box or tradesman trailer | Quality automotive wheel-bearing grease meeting the relevant specifications |
Daily commercial trailer | Good temperature and load performance for frequent towing |
Boat or water-exposed trailer | Water-resistant grease approved for the hub application |
Farm trailer | Protection against moisture, corrosion, and contaminated environments |
Off-road trailer | Suitability for dust, mud, water, and repeated shock loads |
Heavy machinery trailer | Grease approved for high wheel-bearing loads and operating temperatures |
The product label should state that the grease is suitable for wheel bearings. When available, follow the axle, hub, or trailer manufacturer’s recommendation rather than selecting a product based on packaging claims alone.
Grease colour is not a reliable compatibility test. Two products of the same colour may use different thickeners, base oils, or additives.
Can I Use WD-40 to Lubricate Trailer Bearings?
One product to avoid is WD-40. Despite its widespread household use, WD-40 is not a bearing grease it is primarily a water-displacing solvent and light spray lubricant.
Using WD-40 on trailer wheel bearings can wash out the existing grease, leave the rolling surfaces with inadequate protection, and accelerate wear. It evaporates quickly and provides no lasting lubrication film under the load and heat conditions inside a working trailer hub.
Always use a grease product specifically approved for automotive or trailer wheel bearings. If you are uncertain which product suits your specific hub, axle, or trailer type, check the manufacturer’s documentation or ask a trailer servicing professional.
Can You Mix Different Trailer Bearing Greases?
Avoid mixing products unless compatibility has been confirmed.
ExxonMobil explains that incompatible greases can react through their thickener or additive systems. The mixture may become unusually hard or soft, separate excessively, or provide ineffective lubrication.
When the existing product is unknown:
- Remove the bearing
- Clean out the old grease thoroughly
- Inspect the bearing and cup
- Repack with a suitable, known wheel-bearing grease
- Record the product used for future servicing
Do not assume a new product is compatible because it has the same colour as the old grease.
Tools and Parts You Will Need
Prepare the parts before raising the trailer:
- Jack rated for the trailer
- Appropriately rated axle stands
- Wheel chocks
- Wheel brace
- Socket set or spanners
- Pliers
- Hammer and punch
- Seal puller or suitable hand tool
- Clean, lint-free rags
- Suitable parts cleaner
- Bearing packer or clean disposable gloves
- Correct wheel-bearing grease
- New rear grease seal
- New split pin
- Safety glasses
- Torque wrench
- Optional infrared thermometer
Check that you have the correct seal before dismantling the hub. A trailer sitting on stands while you search for a replacement seal can disrupt a working day.
Do You Have to Jack Up a Trailer to Grease Bearings?
Whether you need to jack up the trailer depends on the hub type and what the bearing actually needs.
Some trailers are fitted with a purpose-designed lubrication system, a grease nipple, greasable spindle cap, or similar fitting that allows grease to be added without removing the hub. If your trailer has one of these systems and the bearing only needs a scheduled top-up, jacking may not be required for that specific task.
However, for most conventional tapered-roller bearing setups which cover the majority of Australian light trailers, work trailers, tandem trailers, and commercial trailers a proper repack requires the hub to come off. That means the trailer needs to be safely raised and supported on axle stands.
A top-up through a grease fitting also does not replace a full inspection. It cannot reveal pitting, worn cups, a failing seal, spindle damage, or contaminated grease. If the trailer is due for a scheduled service, or if you have noticed heat, noise, or wheel movement, raise the trailer and remove the hub regardless of whether a grease fitting is present.
How to Grease Trailer Wheel Bearings Step by Step
If you are asking how do you grease trailer bearings, the short answer is that it involves more than pushing grease into a fitting. The bearing needs to come out, be cleaned, inspected, and repacked correctly before going back in. The following steps cover a common tapered-roller bearing arrangement. Hub, brake, and adjustment designs vary, so the manufacturer’s instructions take priority.
Step 1: Park and Secure the Trailer
Park on a solid, level surface. Apply the tow vehicle’s handbrake if the trailer remains connected and place wheel chocks around the wheels staying on the ground.
Unload the trailer where practical. Removing machinery, tools, soil, or building supplies reduces the weight supported during the job.
Loosen the wheel nuts slightly before raising the wheel, but do not remove them yet.
Step 2: Lift and Support the Trailer
Position the jack under an approved lifting point. Lift the wheel clear of the ground and place an axle stand under a suitable support point.
Lower the trailer carefully onto the stand. Confirm that it is stable before removing the wheel.
A jack is designed to lift. It should not be treated as the only support while you work.
Step 3: Remove the Wheel and Grease Cap
Remove the wheel nuts and wheel.
Work around the grease or dust cap gently until it comes free. Avoid crushing or distorting it. A loose or damaged cap may allow water and grit into the hub.
Place removed components on a clean surface in the order they came off.
Step 4: Remove the Split Pin, Nut, and Washer
Straighten and remove the old split pin with pliers. Remove the castle or slotted nut and spindle washer.
Use a new split pin during reassembly. It is an inexpensive part that helps prevent the spindle nut from moving.
Step 5: Remove the Hub and Bearings
Pull the hub towards you carefully. The outer bearing may come free as the hub slides forward, so be prepared to catch it.
Place the outer bearing on a clean rag. Remove the rear seal to access the inner bearing.
A typical trailer hub assembly includes an inner bearing and cup, outer bearing and cup, grease seal, spindle washer, spindle nut, split pin, and grease cap.
Step 6: Clean Away the Old Grease
Remove the old grease from the:
- Bearings
- Hub cavity
- Bearing cups
- Spindle
- Washer
- Spindle nut
- Grease cap
Keep grit, dust, and fibres away from the cleaned parts. Even small contaminants can mark precision bearing surfaces.
Cleaning is not just preparation for new grease. It lets you see whether the bearing is safe to reuse.
Step 7: Inspect the Bearing, Cup, Hub, and Spindle
Rotate the clean bearing slowly by hand. Check every roller and the cage.
Look for:
- Pitting
- Flaking
- Scoring
- Rust
- Cracks
- Blue or dark heat marks
- Rough rotation
- Loose rollers
- Distortion
Inspect both bearing cups inside the hub. A new bearing should not be run against a damaged old cup.
Check the spindle for grooves, scoring, burrs, corrosion, and damaged threads. Timken recommends inspecting the hub and spindle for wear and replacing them where wear is excessive.
Step 8: Pack the Bearing With Fresh Grease
There are two common methods.
Packing by Hand
Place a suitable amount of grease in the palm of a clean gloved hand. Hold the bearing in the other hand and press its wider edge firmly into the grease.
Continue pressing until grease emerges through the spaces between the rollers at the smaller side. Rotate the bearing and repeat until fresh grease appears evenly around the entire bearing.
Finish with a light coating over the outside.
Timken describes the same principle: grease must be forced through the rollers, cage, and cone until it emerges evenly around the opposite side.
Using a Bearing Packer
Place the clean bearing into the packer according to its instructions. Apply pressure until grease passes completely through the roller assembly.
A bearing packer can reduce mess and provide consistent coverage, particularly when servicing several hubs on tandem trailers in the same session.
Step 9: Prepare the Hub
Apply a light film of compatible grease to the relevant internal hub surfaces, bearing cups, and spindle.
Do not automatically fill every empty space in the hub. The correct amount depends on the design. Excessive grease can churn, create heat, and place pressure on the seal. Timken warns that overfilling can increase operating temperatures and contribute to leakage.
Step 10: Install the Inner Bearing and New Seal
Place the packed inner bearing into the rear of the hub.
Install a new grease seal in the correct direction. Press or tap it in evenly using a suitable tool, taking care not to bend the seal or damage its lip.
Timken recommends replacing the grease seal during this type of bearing service.
Step 11: Refit the Hub and Outer Bearing
Slide the hub squarely over the spindle. Move carefully so the spindle does not cut or dislodge the new seal.
Fit the packed outer bearing, followed by the washer and spindle nut.
Step 12: Adjust the Bearing Correctly
Rotate the hub while tightening the spindle nut to seat the bearings. The final adjustment must follow the procedure specified for the hub or axle.
For AL-KO electric-brake hubs, the manufacturer instructs users to seat the bearings while turning the hub, loosen the nut, and retighten it by hand to a finger-tight position before aligning the first slot and fitting the split pin. That procedure should not be assumed to apply unchanged to every other hub design.
The goal is a hub that rotates freely without excessive movement. Too much preload can generate heat; too little adjustment can allow wheel movement and accelerated wear.
Step 13: Refit the Cap and Wheel
Install the grease cap securely.
Refit the wheel, start every wheel nut by hand, and tighten the nuts progressively in a cross pattern. Use the wheel manufacturer’s specified torque rather than guessing or relying only on an impact gun.
AL-KO advises checking wheel-nut torque whenever wheels have been removed and refitted.
Step 14: Complete a Short Road Test
Tow the trailer slowly for a short distance before returning it to full service.
Stop safely and check:
- Hub temperature
- Grease leakage
- Grinding or scraping sounds
- Wheel movement
- Wheel-nut security
- Brake operation
- General towing behaviour
Compare hubs on the same trailer. On a four-wheel tandem setup, one hub being significantly hotter than the other three deserves investigation.
How Much Grease Should You Put in a Trailer Hub?
The bearing rollers must be fully packed, but that does not mean every empty space in the hub should be filled completely.
Too little grease may leave rolling surfaces inadequately lubricated. Too much can cause churning, higher temperatures, leakage, or pressure against the rear seal.
Timken’s trailer guidance states that, for the traditional greases and hub arrangement covered by its document, the hub should only be half full because excessive grease can increase churning and temperature. Treat that as system-specific guidance rather than a universal measurement for every trailer hub.
Avoid counting grease-gun pumps unless the manufacturer provides a specified amount. Pump volume varies between grease guns, and different hubs require different quantities.
What the Old Grease Can Tell You
The old grease can provide useful clues, but it should not be used as the only diagnostic test.
Grease Condition | What It May Suggest |
Milky or cloudy appearance | Water or moisture contamination |
Rust-coloured grease | Moisture and internal corrosion |
Dark grease with a burnt smell | Excessive heat or degraded lubricant |
Metallic sparkle or particles | Bearing, cup, hub, or spindle wear |
Dry or waxy texture | Old or deteriorated lubricant |
Grease leaking behind the hub | Worn, damaged, or displaced seal |
Lumpy or unusual consistency | Possible incompatible grease mixture |
Timken identifies overfilling, underfilling, incorrect grease, mixed grease, worn-out lubricant, water, and debris contamination as common causes of inadequate bearing lubrication. It also notes that overheated grease may become dark and develop a burnt smell.
Finding contaminated grease should lead to further inspection. Do not simply wipe off the evidence, add fresh grease, and close the hub.
Common Trailer Bearing Greasing Mistakes
1. Adding Grease Without Inspecting the Bearing
Fresh grease can temporarily hide noise or dryness, but it cannot repair pitted rollers, damaged cups, or a scored spindle.
2. Using WD-40 or a Light Spray Lubricant Instead of Bearing Grease
WD-40 is not a wheel-bearing grease. It is a water-displacing solvent that evaporates quickly and provides no lasting lubrication under the load and heat conditions inside a trailer hub. Using it can wash out existing grease and leave the bearing unprotected. Always use a grease product approved specifically for wheel-bearing applications.
3. Choosing Grease by Colour
Colour does not tell you whether the thickener and additives are compatible with the existing product.
4. Mixing Unknown Greases
An incompatible mixture may soften, harden, separate, or stop lubricating effectively. Clean the old product out when compatibility is uncertain.
5. Coating Only the Outside
The grease must be worked through the rollers and cage. A shiny outer coating does not mean the bearing is packed.
6. Working With Dirty Tools
Dust, sand, metal fragments, and rag fibres can contaminate a clean bearing. Keep the work surface and tools clean.
7. Reusing a Damaged Seal
A leaking seal can allow grease to escape and dirt or water to enter. On braked trailers, it may also contaminate friction surfaces.
8. Installing a New Bearing Against a Damaged Cup
The cup and cone work together. Replace both when either surface is damaged.
9. Overfilling the Hub
More grease is not automatically safer. Excessive grease can churn and create additional heat.
10. Incorrectly Adjusting the Spindle Nut
A hub that is too tight can run hot. A hub that is too loose can develop wheel movement.
11. Skipping the Road Test
The short test drive is your opportunity to identify heat, leakage, or unusual noise before the trailer is heavily loaded.
How Often Should You Grease Bearings on a Trailer?
How often you should grease bearings on a trailer depends on usage, load, environment, and the axle manufacturer’s recommendation there is no single interval that suits every trailer.
AL-KO’s chassis handbook specifies wheel-bearing service every 12 months or 10,000 kilometres for normal road use and every six months or 5,000 kilometres for the off-road applications covered by that handbook. Those figures are useful reference points, but the schedule for your specific axle and trailer always takes priority.
Trailer Use | Practical Maintenance Approach |
Occasional household use | Inspect before long trips and unusually heavy loads |
Weekly trade use | Conduct regular heat, leakage, noise, and wheel-play checks |
Daily business use | Follow a documented preventive maintenance schedule |
Heavy machinery transport | Inspect before critical loads and use professional servicing |
Farm and rural use | Check after mud, water, rough tracks, and long storage |
Off-road use | Service more frequently according to manufacturer guidance |
Unknown service history | Remove, clean, and inspect rather than simply adding grease |
Tiny house trailer stored in place | Inspect before any future road movement after extended storage |
A trailer that sits unused can still develop problems. Moisture, corrosion, hardened grease, and brake seizure may become apparent when the trailer is suddenly returned to heavy work.
For more guidance on keeping your trailer road-ready, see Halco’s essential trailer maintenance tips.
Greasing Bearings on Different Types of Trailers
The mechanical process of how to grease trailer wheel bearings may be similar across trailer types, but maintenance risk changes significantly with the trailer’s workload and configuration.
Tandem Trailers
Tandem trailers have more hubs and bearings than single-axle trailers, creating more service points. Their dual-axle configuration is commonly used for heavier loads, trade equipment, machinery, and commercial transport.
Service the hubs as a planned group where practical. This makes it easier to compare grease condition, seal wear, bearing adjustment, brake condition, and hub temperature across all four wheels.
Example: A builder finds that the front-left hub is considerably hotter than the other three after servicing. Instead of assuming all four bearings need more grease, the correct next step is to check that hub for bearing preload, brake drag, or component damage.
Hydraulic Tipper Trailers
Hydraulic tipper trailers are frequently used to carry soil, gravel, mulch, green waste, and construction materials. These trailers can complete several loaded and unloaded trips in a single day. Short travel distances do not eliminate bearing stress each trip still creates load, braking, and heat cycles.
Example: A landscaping business towing three loads of soil in the morning and removing green waste in the afternoon is putting real stress through the hubs. A leaking seal or warm hub discovered during a pre-start check is far easier to manage at the yard than beside a highway.
4.5 Tonne Trailer
A 4.5 tonne trailer carries significantly greater loads than a light household box trailer. Its bearings, hubs, brakes, tyres, and suspension should be maintained as a complete running system rather than as isolated parts.
Do not use generic light-trailer adjustment assumptions on a heavy-duty trailer. Confirm the axle and hub specifications, particularly when the service history is unknown.
Example: A contractor preparing to move a mini excavator notices metallic particles in the old grease. Repacking the bearing and loading the machine would be a poor decision. The bearing, cup, spindle, and hub should be inspected before the trailer returns to service.
Plant Trailer
A plant trailer may carry excavators, compact loaders, rollers, mowers, or other machinery. Before a major machinery transport job, check more than the grease. Inspect bearings and cups, grease seals, hubs and spindles, brake components, tyres and wheel nuts, suspension, and coupling and safety chains.
Finding a leaking seal before loading the machine may delay departure briefly. Finding an overheated hub while fully loaded creates a far more difficult and expensive problem.
Post-Service Safety Checklist
Before loading or towing at normal speed, confirm that:
- The new split pin is fitted securely
- The grease cap is installed
- The hub rotates smoothly
- There is no excessive wheel movement
- The rear seal is not leaking
- Brake components are free from grease
- The wheel nuts are tightened correctly
- The tyre is correctly inflated
- No grinding or scraping is present
- Hub temperatures are checked after a short drive
- The service date and grease product are recorded
Keeping a basic maintenance log is useful for small businesses and fleet owners. Record which hubs were serviced, what parts were changed, and what grease was used.
When Should You Call a Trailer Repair Professional?
Stop the DIY job and arrange an inspection when:
- The spindle is deeply scored, grooved, or heat-discoloured
- A bearing cup is loose inside the hub
- The hub or brake drum is cracked or heavily scored
- Grease has contaminated the brakes
- The wheel has major movement
- The recently serviced hub remains unusually hot
- You cannot identify the hub or bearing-adjustment procedure
- The trailer carries expensive machinery, vehicles, or commercial loads
- You cannot lift and support the trailer safely
Professional help is also sensible for braked trailers when bearing maintenance exposes brake wear, damaged magnets, leaking seals, or drum problems.
A professional inspection is equally worthwhile before registration, when buying a used trailer, or before putting a trailer into heavier commercial work.
Halco Trailers provides professional trailer servicing covering bearings, axles, brakes, suspension, electrical systems, and structural work for box trailers, plant trailers, machinery trailers, and custom-built units from its Warragul workshop.
Keep Your Trailer Ready for Work
Learning how to grease trailer wheel bearings gives you a better understanding of one of your trailer’s most important maintenance points. The job is successful only when the bearing has been cleaned, inspected, packed correctly, reinstalled with a sound seal, and adjusted to the proper specification.
For a lightly used DIY trailer, careful home maintenance may be practical. For daily-use tandem trailers, hydraulic tipper trailers, a 4.5 tonne trailer, or a heavily loaded plant trailer, professional servicing can reduce downtime and help identify brake, hub, spindle, or suspension problems before they become roadside failures.
Keep your trailer running safely between jobs.
Halco Trailers provides bearing repacks, brake inspections, running gear servicing, and parts supply across Warragul, Gippsland, Melbourne, and regional Victoria. Whether you need a bearing kit, a hub inspection, or a full trailer service our team can help.
Contact Halco Trailers →
Faq's
To grease trailer bearings properly, raise and support the trailer, remove the wheel and hub, clean all old grease from the bearings, cups, hub cavity, and spindle, inspect every component for wear or damage, force fresh wheel-bearing grease through the rollers until it emerges evenly on the opposite side, install a new seal, refit and adjust the hub to the correct specification, and complete a short road test. Adding grease through a fitting without removing the hub may be suitable for scheduled top-ups on purpose-designed systems, but it does not replace a full inspection.
How often you should grease bearings on a trailer depends on how it is used. AL-KO's guidance suggests every 12 months or 10,000 kilometres for normal road use and every six months or 5,000 kilometres for off-road applications but the schedule for your specific axle and trailer always takes priority. Daily-use commercial trailers, farm trailers, and machinery transport trailers benefit from more frequent checks. A trailer with an unknown service history should be inspected and repacked before returning to heavy use.
For most conventional tapered-roller bearing setups which cover the majority of Australian light trailers, work trailers, and commercial trailers, the trailer needs to be safely raised and supported on axle stands so the hub can be removed for a proper clean, inspection, and repack. Some trailers fitted with purpose-designed grease nipples or lubrication systems may allow a top-up without removing the hub, but this does not replace a full inspection if heat, noise, or wheel movement has been noticed.
No. WD-40 is not a bearing grease, it is a water-displacing solvent and light spray lubricant that evaporates quickly and provides no lasting lubrication under the heat and load conditions inside a working trailer hub. Using WD-40 on trailer wheel bearings can wash out the existing grease and leave the rolling surfaces unprotected. Always use a grease product specifically approved for automotive or trailer wheel bearings.
Some purpose-designed lubrication systems allow grease to be added through a fitting without dismantling the hub. However, conventional bearings need to be removed for a complete clean, inspection, and repack. Adding grease alone will not reveal pitting, corrosion, worn cups, or spindle damage.
Only use it when the product is specifically approved for the wheel-bearing application and meets the required manufacturer specifications. A general-purpose label alone does not confirm suitability.
Grease should emerge evenly through the spaces around the opposite side of the roller assembly. Continue rotating and packing the bearing until every section has been covered.
Yes. Excessive grease can churn, increase temperature, leak through seals, and potentially reach brake components. Use the amount required for the specific hub system.
Replacing the rear grease seal is the safer approach once it has been removed or disturbed. A damaged or poorly seated seal can allow grease out and contaminants in.
Possible causes include excessive bearing preload, brake drag, insufficient lubrication, overfilling, damaged bearing cups, incorrect parts, or a worn spindle. Stop towing and identify the cause rather than adding more grease.
Servicing all hubs during the same maintenance period creates a consistent service history and makes it easier to compare wear, adjustment, and temperature across all wheels. This is particularly useful for commercial trailers.
Base the schedule on the axle manufacturer's instructions, trailer use, distance, load, and operating conditions. A plant trailer carrying machinery regularly will normally require closer inspection than a lightly used household trailer.
Rust indicates moisture has entered the bearing area. Clean and inspect the rollers and cups carefully. Replace the bearing and matching cup if there is corrosion, pitting, or surface damage.
No. Grease may reduce noise briefly, but it cannot reverse physical wear. A noisy bearing should be cleaned and inspected, then replaced if its rollers or cups are damaged.

Newsletter
Latest Post